
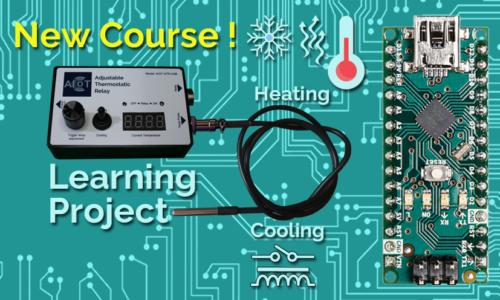
In this course, you’ll not only learn about the Arduino Nano, but you’ll also learn how to build a fully automated and user Adjustable Thermostatic Relay.
At the end of this course, you’ll have built and programmed your very own Adjustable Thermostatic Relay and learned many new things about the Arduino Nano microcontroller, how to use a DS18B20 Waterproof Temperature Sensor, the TM1637 7-Segment 4-digit LED Display, the rotary encoder and so much more.
If you are an absolute beginner, the course also includes introduction modules on the Arduino Nano, how to install the IDE (Integrated Development Environment) software, as well as a basic refresher on C++ to help the beginner level students.
Nous simplifierons votre expérience d’apprentissage car nous fournissons tout le code et vous permettrons de suivre facilement les instructions étape par étape, en expliquant chaque ligne du code. Nous vous encouragerons également à consulter quelques ressources et exercices en dehors du cours pour vous familiariser avec certains des outils requis, et en un rien de temps, vous aurez une bonne compréhension des bases.
The fact that there are so many real-world applications for this type of device is compelling enough for us to have created this course. Whether you’re looking for a way to keep the liquid temperature of some container between certain values, or want to cool something which is getting to hot, this practical project will help you achieve this.
We also show you how to display a warning message which will scroll on your LED display when a certain predefined condition occurs as well as help guide you in building a more permanent and portable version of the Thermostatic Relay using an external power supply.
So, we hope you decide to join us on this exciting learning adventure, and I’ll see you in the next lecture.
Features
- You'll learn how to use a Microcontroller in the context of a project to display & adjust both LOW & HIGH temperature limits and automatically actuate a RELAY
- Basic refresher courses on the Arduino Nano Micrcontroller, the Arduino IDE (IDE) or Integrated Development Environment as well as C++ for beginners
- Learn how to use a DS18B20 Waterproof Temperature Sensor, the TM1637 7-Segment 4-digit LED Display, a rotary encoder and much more
- Learn how to use a single Momentary Push Button to control multiple items by discerning between a "SHORT PRESS" and a "LONG PRESS"
- Build a professional looking Automated Thermostatic Relay unit enclosed in a project box using downloadable drill hole templates and labels
Target audiences
- Electronics enthusiasts
- If you'd like to learn how to automate equipment based on sensor data
- Anyone interested in learning how to create great projects using an Arduino microcontroller
Requirements
- A basic understanding of electronics
- A computer along with basic computer skills
- Some basic electronic parts are required (covered in lecture 3)
- No paid software required - the Arduino IDE and all required code are free to downloads
Curriculum
- 7 Sections
- 31 Lessons
- Lifetime
- Section 1: IntroductionThis is the introduction of Section 1 in which we'll cover off the basics of what you'll need to complete the course.5
- Section 2: Basic RefreshersAfter completing this section, you'll have a great foundation to tackle section 3 as well as a great understanding of what the software will do based on reviewing the Programming Code Flow chart.6
- Section 3: Waterproof Temperature SensorAt the end of this section, you'll know everything you need to know about the DS18B20 waterproof temperature sensor6
- Section 4: LED DisplayAt the end of this section, you'll know everything you need to know about the TM1637 7-Segment 4-Digit LED Display.6
- 4.1Lesson 15: Intro1 Minute
- 4.2Lesson 16: The TM1637 LED Display4 Minutes
- 4.3Lesson 17: Installing & Reviewing the Required Libraries6 Minutes
- 4.4Lesson 18: C++ Sketch to Display the Temperature on the LED Display4 Minutes
- 4.5Lesson 19: Section 4 Lab – Wiring the TM1637 and Testing4 Minutes
- 4.6Quiz 43 Minutes4 Questions
- Section 5: Rotary EncoderAt the end of this section, you'll know everything you need to know about the Rotary Encoder used in our project.7
- 5.1Lesson 20: Intro1 Minute
- 5.2Lesson 21: The Rotary Encoder Review & Library Installation7 Minutes
- 5.3Lesson 22: C++ Sketch to detect the momentary push button9 Minutes
- 5.4Lesson 23: C++ Sketch to read Rotary Encoder & set Low Temp value16 Minutes
- 5.5Lesson 24: C++ Sketch to read Rotary Encoder & set High Temp value8 Minutes
- 5.6Lesson 25: C++ Sketch to save Low/High Temps to memory9 Minutes
- 5.7Quiz 53 Minutes4 Questions
- Section 6: Relay & Status LEDAt the end of this section, you'll know everything you need to know about the LOW & HIGH trigger Relay Module.6
- 6.1Lesson 26: Intro1 Minute
- 6.2Lesson 27: The One Channel Low Level Trigger Relay Module5 Minutes
- 6.3Lesson 28: Updating the C++ Sketch to Actuate the Relay and LED’s9 Minutes
- 6.4Lesson 29: Wiring the Relay & LED’s3 Minutes
- 6.5Lesson 30: Section 6 Lab – Finished Project Demonstration8 Minutes
- 6.6Quiz 63 Questions
- Section 7: Bonus SectionWe've added this section as a bonus if you'd like to push the project even further !!!1
FAQs
No, although we do go deep on some subjects, we include detailed explanations accompanied by visual aids to make the course beneficial to both knowledgeable and beginner level students
Yes, the code is fully downloadable, and we walk through it line by line in every lecture. As the course progresses, we continuously build upon the code from earlier lessons, enabling you to follow the development process from start to finish. This structured, hands-on approach makes it much easier to understand both the code and the underlying concepts..
Instructor

I learned a lot about micro controllers and components like rotary encoders, LED displays and programing in general.The explanations are clear and the visual graphic aids are very professional...
Amy Vangelista
I learned a lot about micro controllers and components like rotary encoders, LED displays and programing in general.The explanations are clear and the visual graphic aids are very professional...
Amy Vangelista